The SOLIDWORKS Rx tool lets you easily record video and diagnostic information to troubleshoot, check system performance, and update your video card drivers. It also allows you to run tests and compare those with the results of other SOLIDWORKS users. By becoming familiar with using the SOLIDWORKS Rx tool, you will have the diagnostic tools you need to communicate and troubleshoot any issues you encounter in SOLIDWORKS.
Capturing Issues using SOLIDWORKS Rx Tool
If the issue you are experiencing is repeatable, you can make a recording of the problem with SOLIDWORKS Rx by following these steps:
Note: SOLIDWORKS RX Capture is common for both Electrical and CAD software
STEP 1: Capture Problem
- First, close down SOLIDWORKS
- Activate SOLIDWORKS Rx from Start > All Programs > SOLIDWORKS > SOLIDWORKS Tools, and pick SOLIDWORKS Rx from the menu
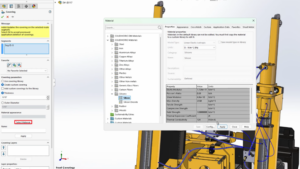
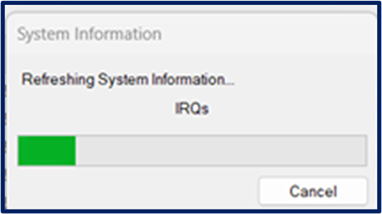
- During the Initial Process, the System information will run as shown below:
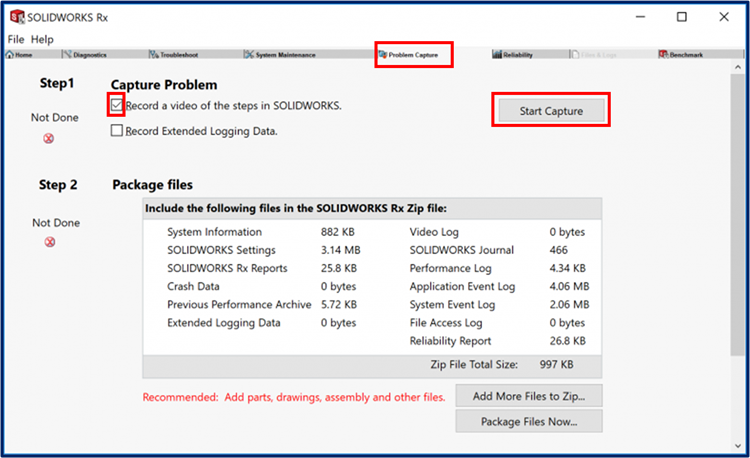
4. Once system information is completed, click on the Problem Capture tab, as shown in the figure below, to access the wizard.
5. On the problem capture page, ensure the record a video option is selected and pick the Start Capture button.
6. SOLIDWORKS will then launch, and you need to pick the Start Recording button and recreate the problem

7. Once you have reproduced the issue in SOLIDWORKS. pick Finish Recording
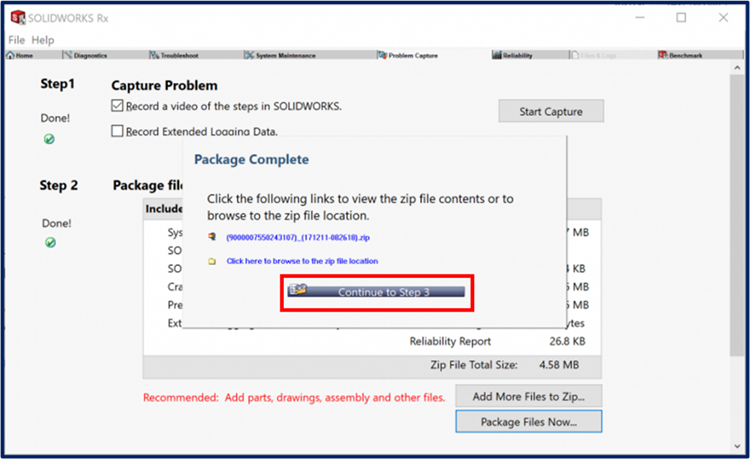
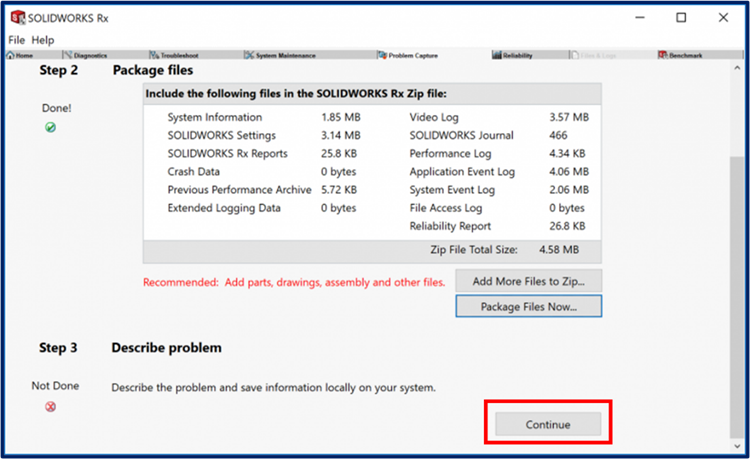
Step 2: Package Files
- The recording and log files will be added automatically to a ZIP file; you can add associated SOLIDWORKS files using the Add more files to zip button, browse for the files, and pick Add files to the package when done.
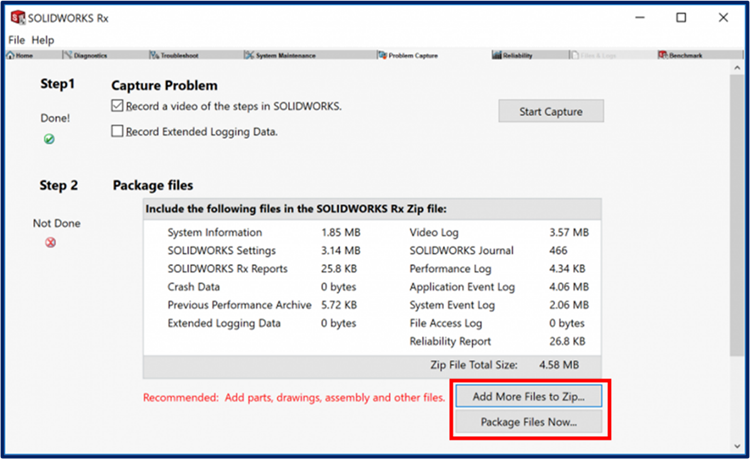
- When complete select the Package Files Now button
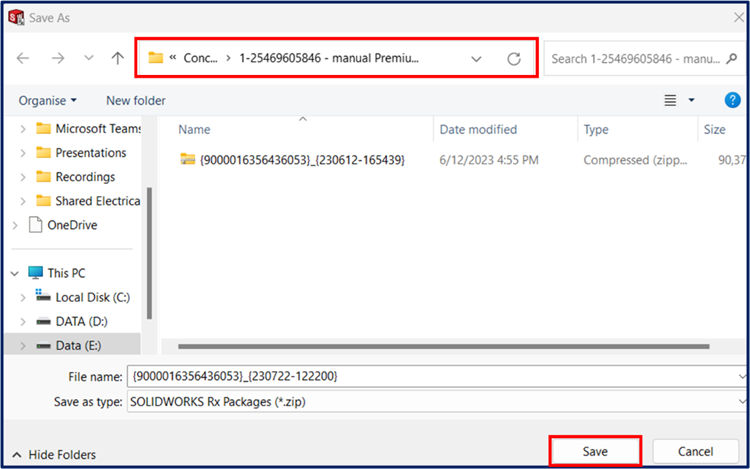
- Fill the name of the issue and save with your preferred location as shown below.
- After the zip file is saved Package complete option will pop up, then click Continue to Step 3
Step 3: Describe Problem
- At the foot of the dialog pick the Continue button to describe the problem
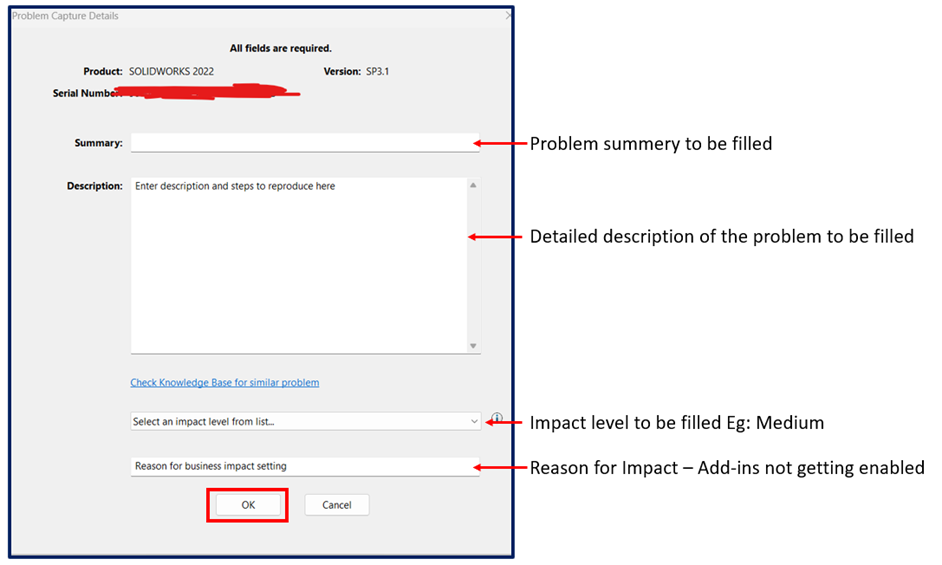
- Fill out the Problem Capture Details form describing all the details for your problem and then pick OK
- The problem capture will now be complete, and you can browse to the zip file location where you saved and share to Support@ckonnect.in
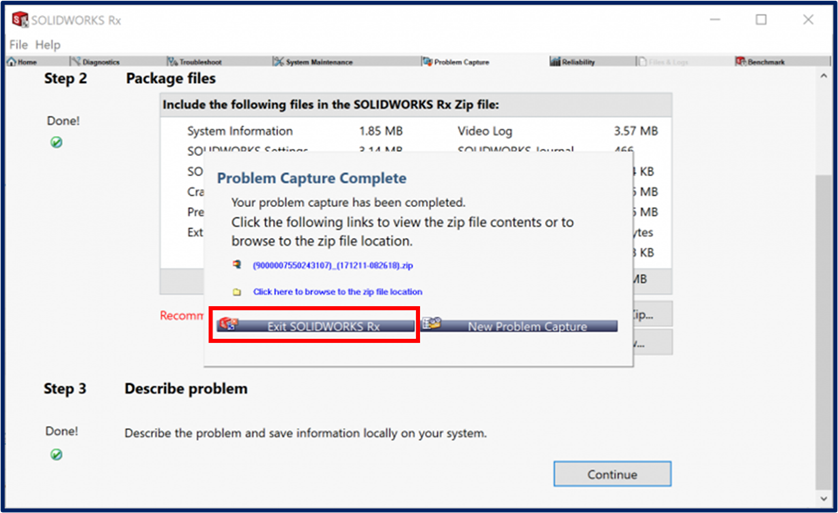
- Select Exit SOLIDWORKS Rx
The SOLIDWORKS Rx files, along with the video, help troubleshoot the issues the SOLIDWORKS user faces. The technical support team usually requires these files to understand the details and provide resolution. This blog shows the step-by-step procedure for creating the SOLIDWORKS Rx files. For any technical issues faced by SOLIDWORKS, users can approach Conceptia Konnect mail to support@ckonnect.com