Auto-archiver in SOLIDWORKS Electrical Schematic 2D allows you to automatically backup your SOLIDWORKS Electrical environment. An individual using a server environment doesn’t have to be conscious of backing up their project while using Auto-archiver.
The collaborative service that keeps everything connected is not captured by conventional back up methods that use SQL and electrical data. As a result, they are NOT the most effective approach to back up the electrical environment. Using the Archive Environment function is the right strategy for backing up SOLIDWORKS Electrical Schematic data!
To prevent work or data loss, an archived environment should be regularly built and stored in the software’s libraries. Additionally, by using this procedure, all ongoing electrical projects will be documented. In order to properly archive an environment, every electrical project needs to be closed. The software should be turned off or closed on the client machines to prevent any opened documents from causing the archived environment operation to fail.
The Auto-archiver is usable as of SOLIDWORKS Schematic 2021. When the Schematic software is installed, this application also gets installed.
The prerequisite is to ensure that Schematic software and the task to be used should be on the same workstation when making plans for your Auto-archiver. It is possible to use a server, but you must ensure that a Schematic client is set up there as well. If a client machine is used instead of a server, Windows Task Scheduler must be installed on it, and the client machine must be kept powered on during the off-hours chosen for the task’s start-up time. Let’s go through the procedures involved in putting this archiver into action.
Windows Task Scheduler
Launching the Windows Task Scheduler is the first action to take. The SOLIDWORKS Schematic client software needs to be installed on the server so that the task scheduler can run without requiring a user’s computer to be turned on or logged in.
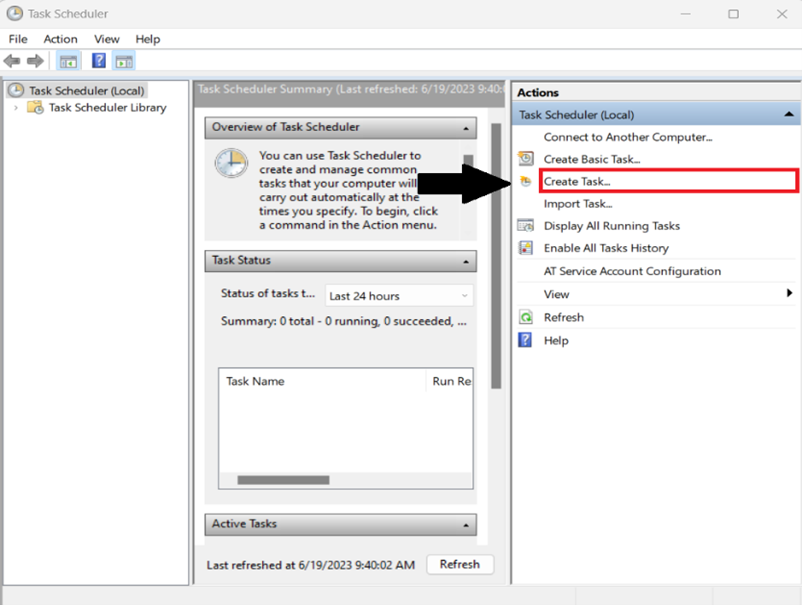
Step 01: Click on start, open Windows Task Scheduler and click on create Task
If you don’t get the task scheduler, browse at C:\Windows\System32\taskschd.msc, and it can be accessed from any machine running Windows.
Then, a secondary dialogue box will appear, where we can enter all of our information
Note: You must be a full administrator on the server where the task is being created The secondary dialog box is shown below
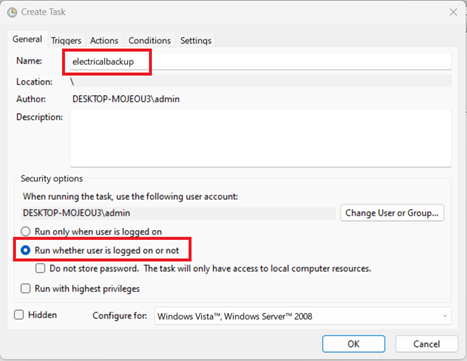
Step 02: Enter Name, remember to fill without any special characters or gaps
Step 03: Select the “Run whether user is logged on or not” radio button.
DO NOT SELECT OK YET! Only General tab is filled and need to fill other tabs as well!
Using a System account, which will have administrative rights on the server, is the best scenario. This account will ONLY run this task.
Step 04: Click the trigger Tab, Select New from the bottom left corner of the dialog.
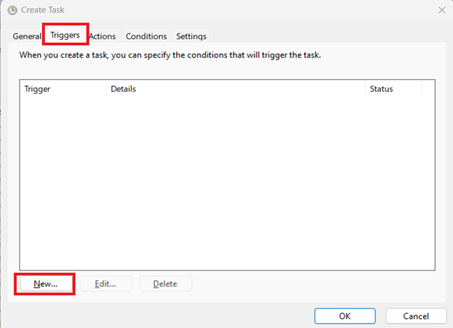
Upon clicking new, a dialog box will pop up as shown below:
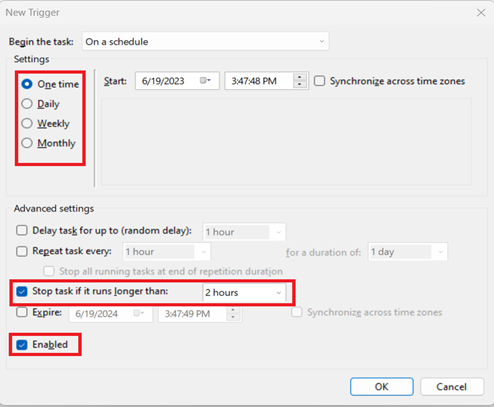
Step 5: Fill Begin the task as per your convenient and select Stop task if it runs longer than (Time can be defined as per your convenient) and select enabled if not checked then click OK
Step 6: click Actions Tab, Select New from the bottom left corner of the dialog
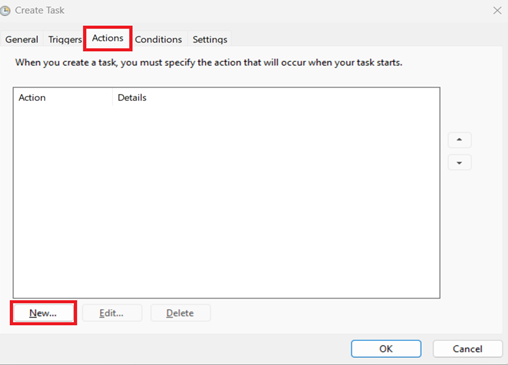
Upon clicking new, a dialog box will pop up as shown below:
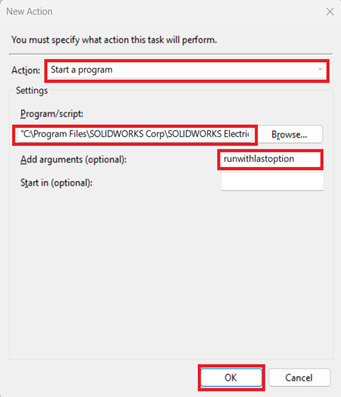
Step 7: Fill the Below mentioned Details:
- Action: Start a program
- Project Script: Brouse for “C:\Program Files\SOLIDWORKS Corp\SOLIDWORKS Electrical\bin\EwEnvironmentArchiver”
- Add argument: “runwithlastoption”
- Finally, Click OK
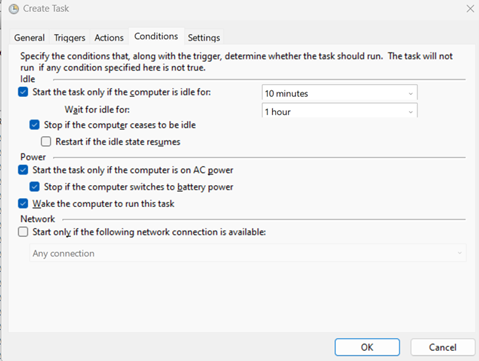
Step 8: Continue to Conditions, Below are the most common settings. However, you can decide what these options should be for your company.
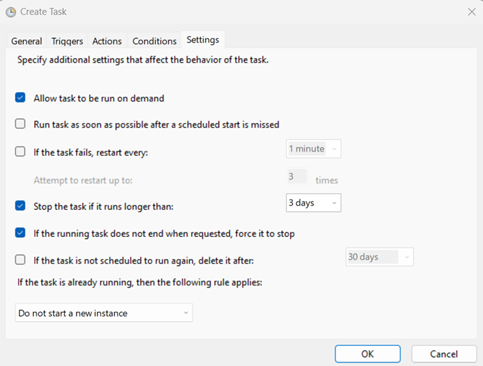
Step 9: Settings Tab, Again, select the parameters based on what works best for your company.
The most common settings are listed below.
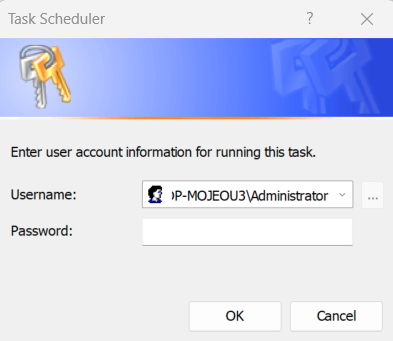
Step 10: Click ok to complete creation of task, upon clicking the below dialog box appears to enter the credentials as per the company’s parameters
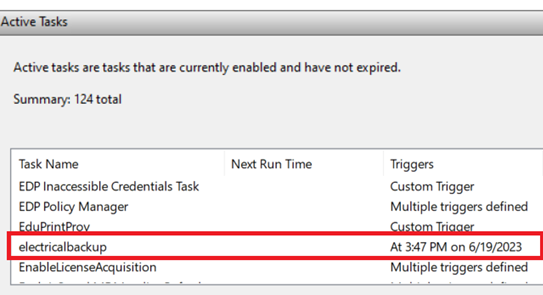
Step 11: Cross-check whether the task was correctly generated in the active task plane.
We are now done with Windows Task Scheduler, but there are still a few steps left to complete.
SOLIDWORKS Electrical Schematic software
Step1: Proceed to the SOLIDWORKS Schematic software and open it. When the Project Manager Dialog window pops up – go ahead and close it
Note: There should NOT be any projects, symbols, libraries, etc. open. The software should be closed for all users when creating a successful archive. Best Practice is for the users to close the software when it is not in use.
Step 2: click dropdown arrow below Archive Environment and select Run External Archiver
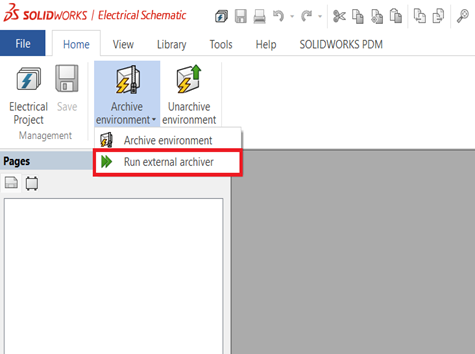
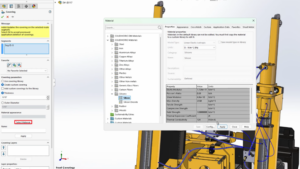
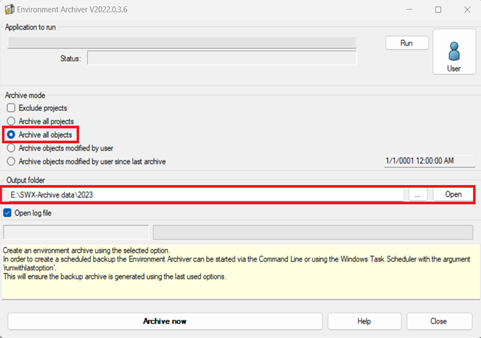
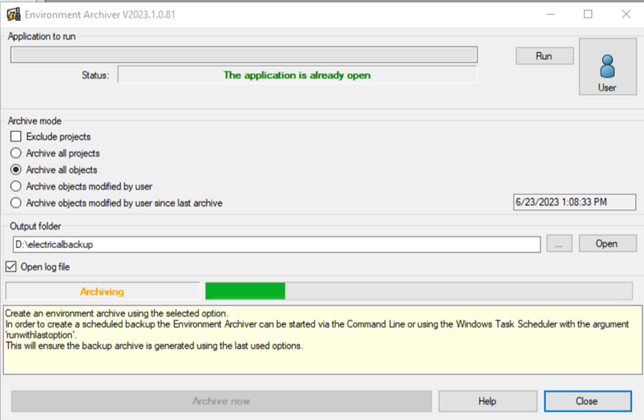
Step 3: Upon selecting Run External archiver, a new Dialog window will appear for the Environment Archiver.
Select Archive all objects and fill the output folder path with your preferred location
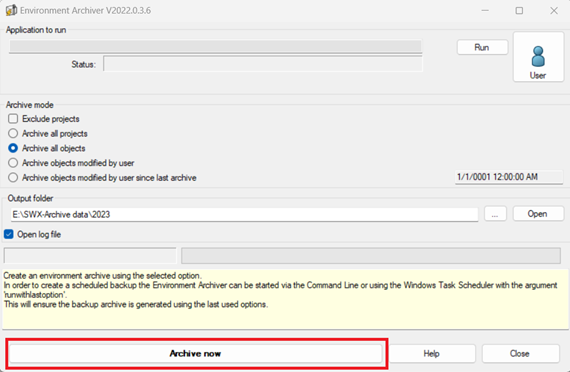
Step 4: Once these selections have been made, click the Archive now button to save these settings for future use. The external archiver will then use these parameters along with the Windows Task Scheduler
Step 5: upon clicking Archive now, you will be promptedto start the archiving right away, if required Choose Yes else No
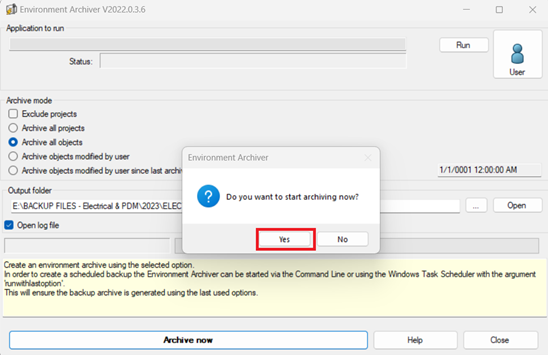
Step 6: If selecting YES, you should notice that the dialog window that shows the application started in the background, the archiving process in Archiving, and the green status bar is moving.
Step 7: Verification of the task
The archive will not work if the Software is launched and a project is opened by a user. The best time to use this, will be when users are not using it. You can then close the dialog.
Step 8: Please open the File Explorer to proceed to the location for your saved archive files. You will notice an archive file and a log.
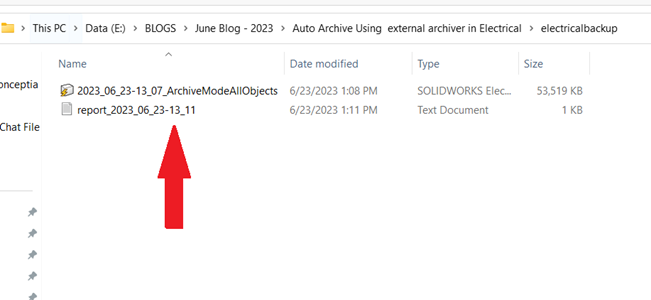
This file is the first archive you downloaded & the log will record what happened during the archive process.
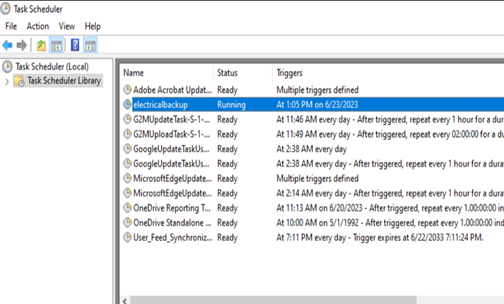
Step 9: You may find your newly created task by returning to the Windows Task Scheduler. To locate the task, you might have to select the Task Scheduler Library.
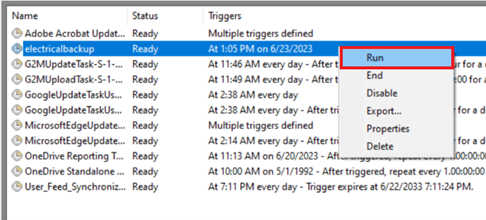
Step 10: Once located, right mouse click and select Run.
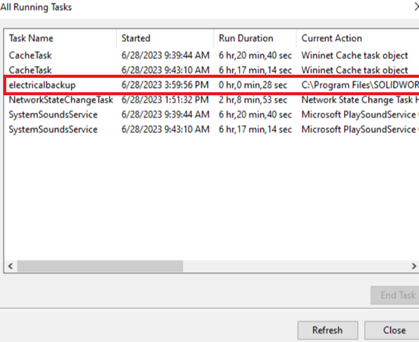
Step 11: To verify it is running, select the Display All Running Tasks from the right side of the Windows Task Scheduler. The Archiver should be in the list of running tasks.
Implementing the SOLIDWORKS Electrical Auto-Archiver setup offers numerous benefits to you organization. This feature ensures the automatic backup and archiving of electrical design files, providing a secure and reliable data management solution.
By utilizing the Auto-Archiver setup, we can safeguard our valuable design data from potential loss or corruption. It eliminates the need for manual backups, reducing the risk of human error and ensuring that our design files are consistently protected. We hope the step by step approach as mentioned above will help in implementing the SOLIDWORKS Electrical Auto – Archiver.