

When working with SOLIDWORKS Assemblies, clearly communicating hole and tapping requirements is essential for accurate manufacturing. While tapped holes and other hole specifications are typically defined at the part level, there are situations where the assembly drawing needs to clearly communicate the required manufacturing operation.
This is where Hole Wizard and Hole Symbol Annotations in SOLIDWORKS Assembly can be useful. Designers can use assembly-level hole features and annotations to represent tapped holes, clearance holes, counterbores, countersinks, and other hole specifications in a standardised way.
By displaying the correct hole symbol and manufacturing information on an assembly drawing, designers can help manufacturing teams quickly identify which holes require tapping or other machining operations. This reduces ambiguity, minimises the risk of incorrect manufacturing operations, and ensures that the design intent is communicated clearly from design to manufacturing.
In this guide, we’ll explore how to enable Hole Wizard in a SOLIDWORKS Assembly and use Hole Symbol Annotations to clearly define hole and tapping requirements for manufacturing drawings
Hole Symbol Annotation:
Tap holes and other holes need to be defined symbolically to make the drawing identical for the Manufacturing team. It will make them understand which need to have the operation of tapping on it. Meanwhile, it will reduce the chance of doing the wrong operation. Usually, it will be mentioned on the part, but when it comes to Assembly, it will show a normal hole. If any designer needs to give details of the tapping operation, he can use it on the Assembly interface.
Step 1 :
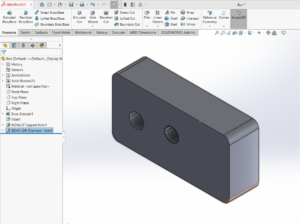
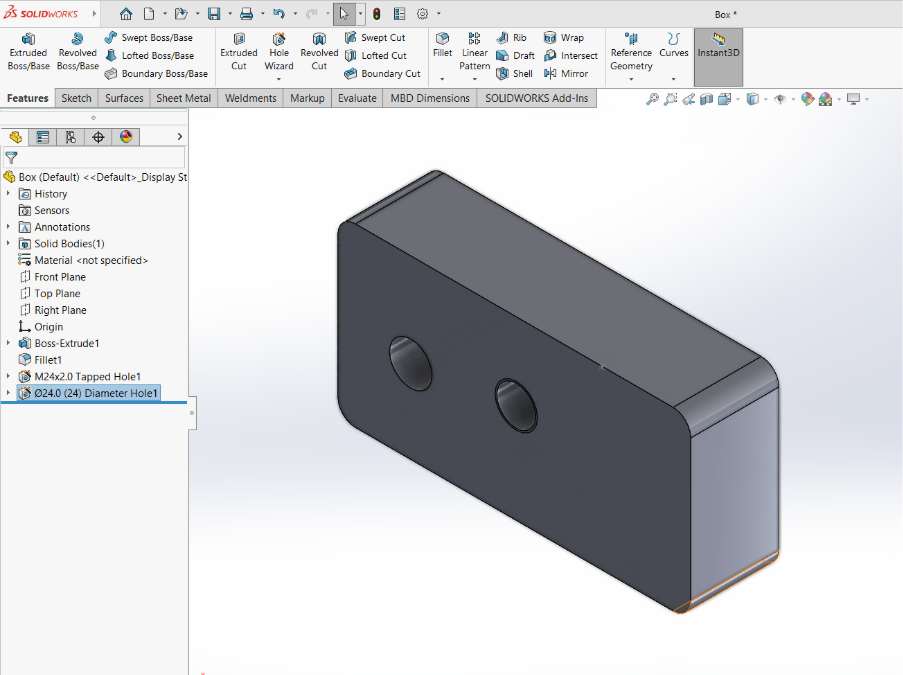
I have created the Rectangle box with the specific dimensions and randomly added a tap hole by using the straight tap feature (Hole wizard) and also a hole for creating the a simple hole.
Step 2 :
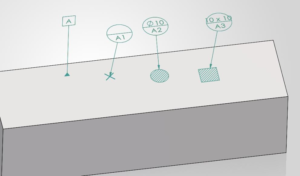
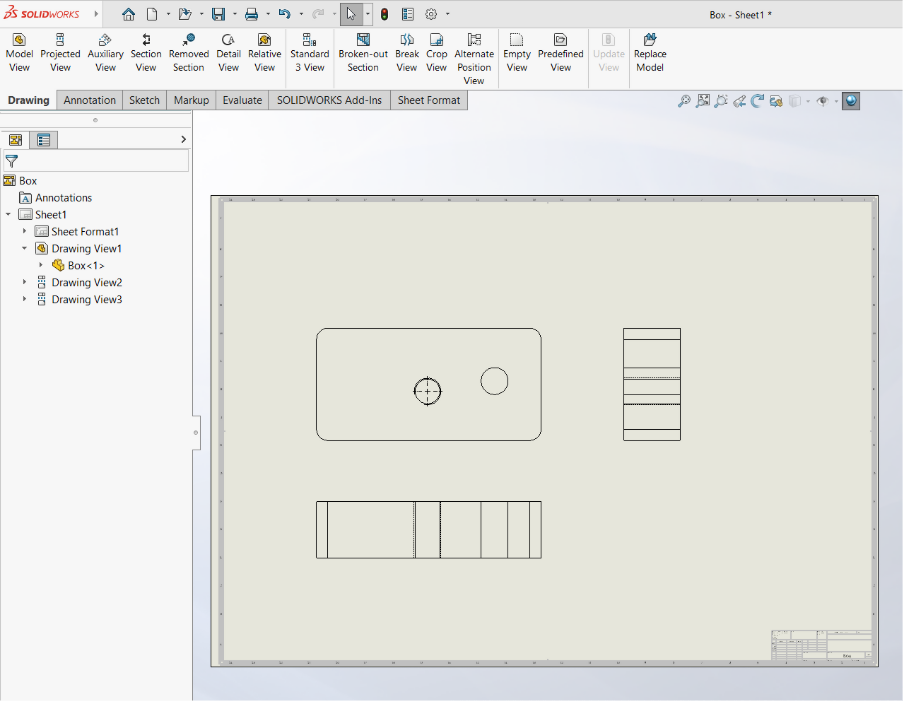
Then, I have created the drawing for the part (BOX); it shows the symbol of the tap hole and a simple hole based on the details provided. The annotations have been created based on the features created.
Step 3 :
Further, I will make the same Box model (part file) utilized for the assembly file. Usually, the designer will create the parts and utilize them in the assemblies. Compared to the part and assembly files, there is a difference in the annotations.
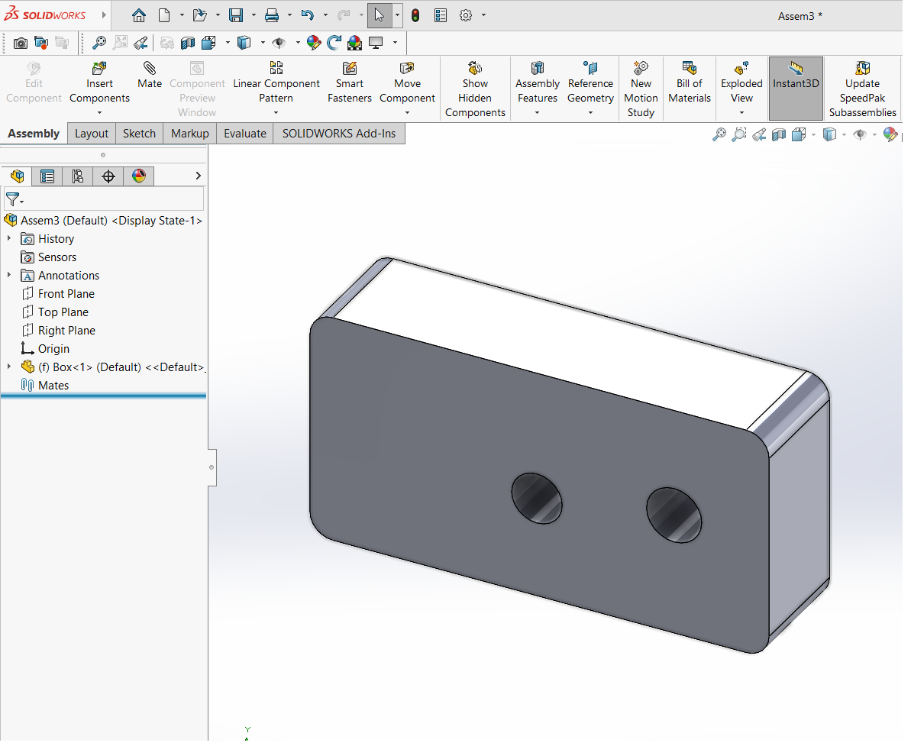
Step 4 :
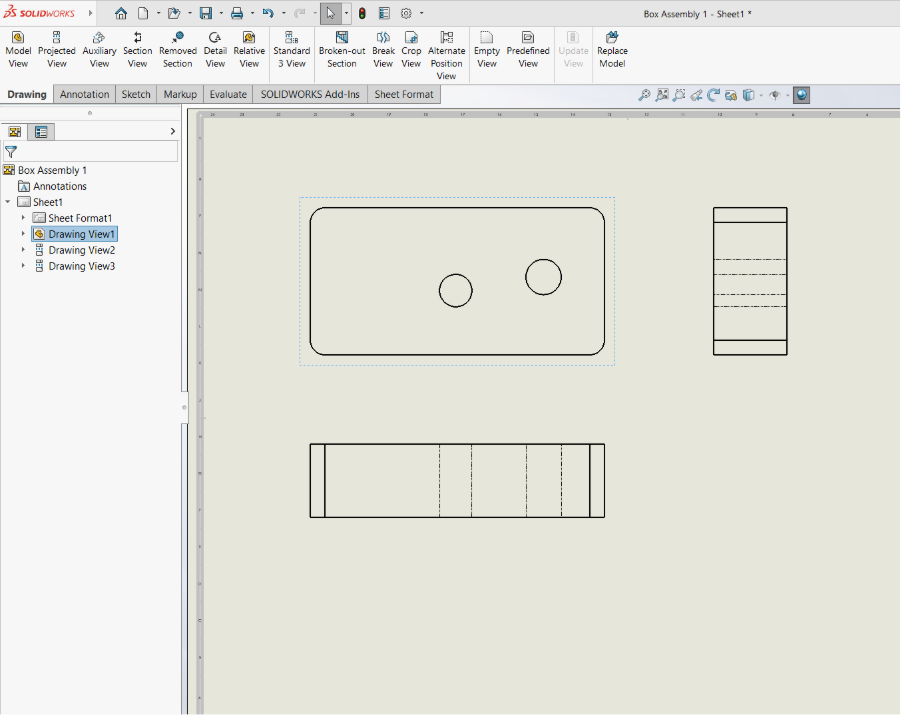
Now, I am creating a drawing from the model for sharing with the manufacturing team. Now it shows both holes in the same details. So, it will confuse the team and need to have the clarification for doing the progress.
Step 5 :
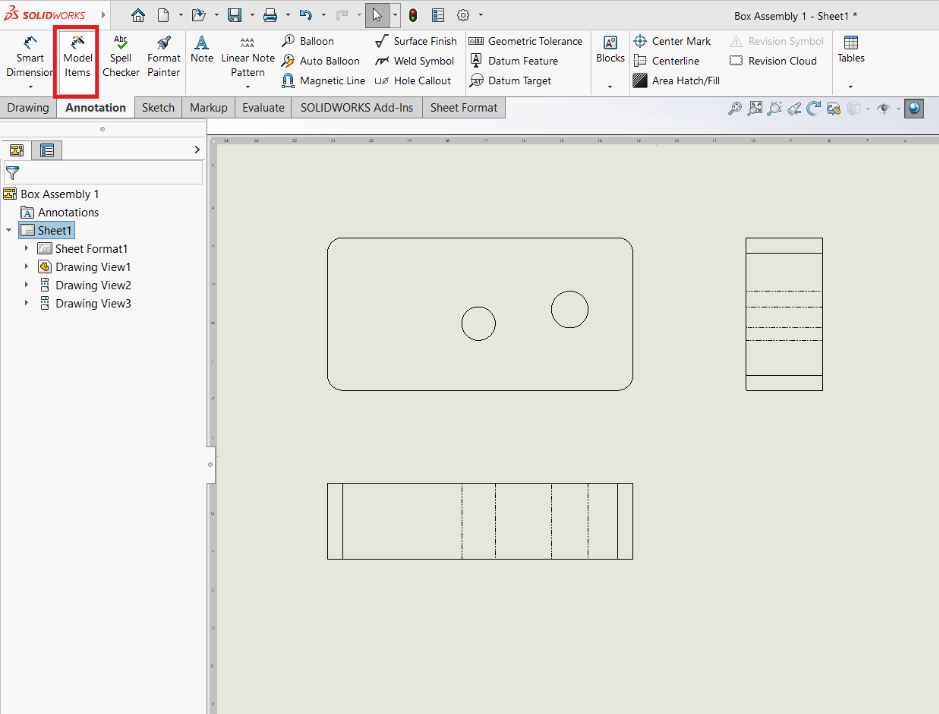
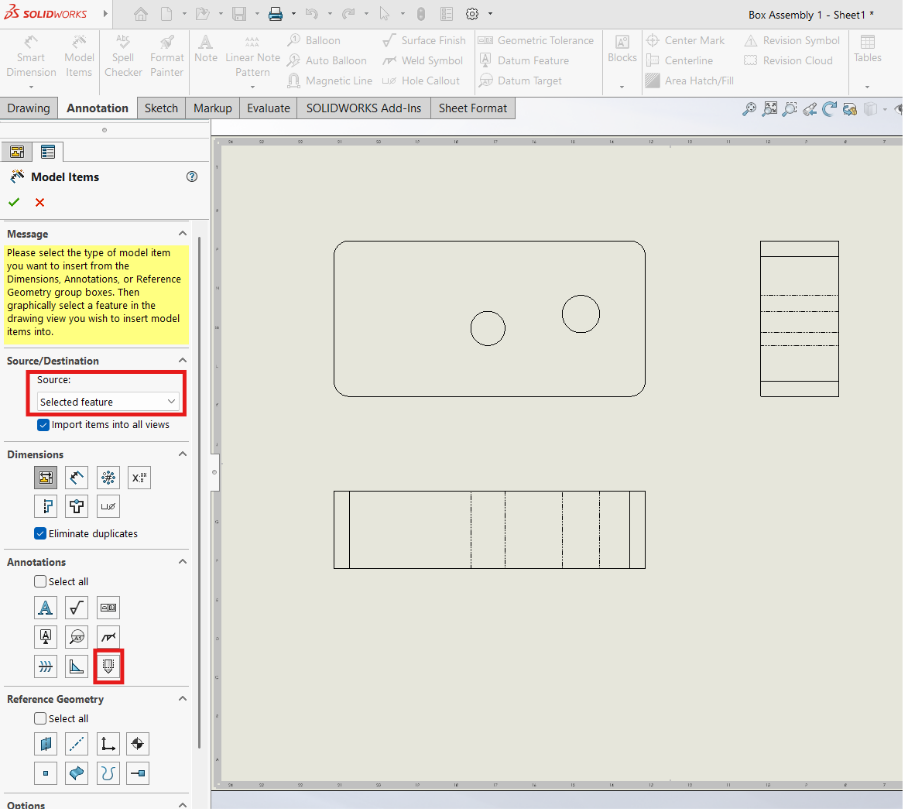
To make the hole annotation like the details provided. Click the model items in the Annotations tab. Once you click the option, it will open, and in that, we will figure out the source for selecting the view or model option, along with the required annotation of the cosmetic thread.
Step 6 :
Once it is enabled, it will show the difference in annotations similar to those in the part file for the hole, respectively.
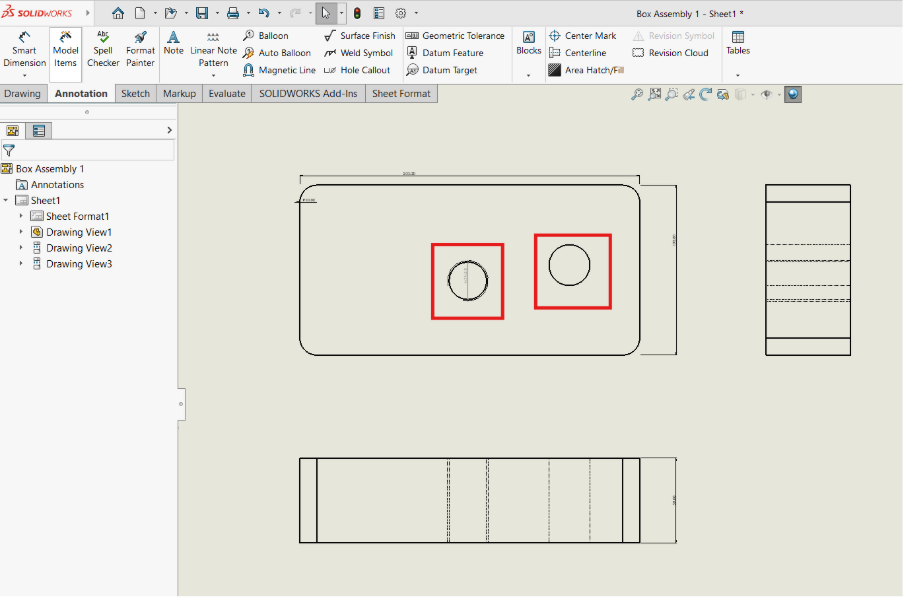
Once it updated, it will easier to make the detailed view of the annotation accordingly for better understanding of the design and manufacturing team communication gap.
Conclusion
The Model Items option helps bring the required Hole Wizard annotations, including tapped-hole and cosmetic-thread symbols, into assembly drawings. By enabling the appropriate model items, designers can represent holes clearly and consistently with the part drawing, making the manufacturing requirements easier to understand. This improves drawing clarity, reduces confusion between standard and tapped holes, and minimizes the possibility of incorrect manufacturing operations.
Read Few More Related Blogs:
Accessing the Hole Wizard configurations in a Design Table in SOLIDWORKS