Sometimes while designing components we find that there are many commonly used files, parts, or library features.
To speed up our design process we can add these commonly used files to Design Library. In this blog we will show you how to add file locations to the design library.
Method 1:
We will start by locating the Design Library in the UI.
The Design Library can be accessed through the task pane which is located towards the right side of the SOLIDWORKS UI as shown in below image
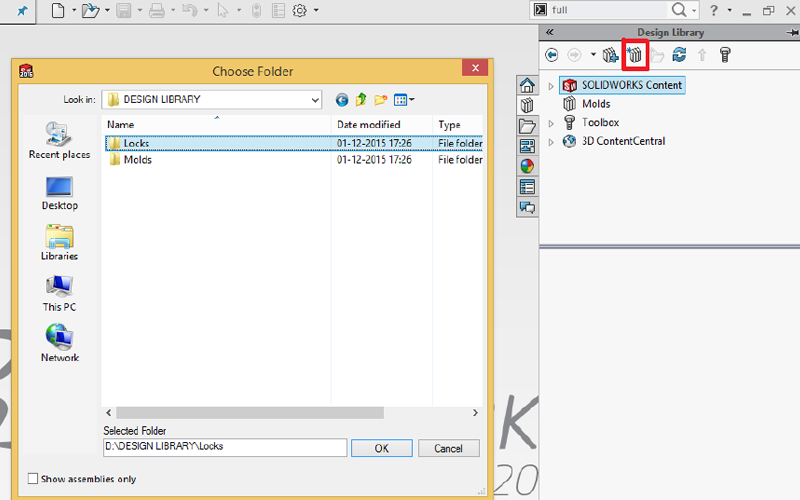
To add a new file location click the ![]() ”Add File Location” icon in the Design Library pane.
”Add File Location” icon in the Design Library pane.
Once the Icon is clicked a Windows Explorer Dialog Box opens as shown below
Browse through the Windows Explorer and select the folder which contains the required files. Click OK.
The Selected folder and all the Sub Folders under it will be added to the Design Library.
Method 2:
We can also add the file Location as shown below
Click ![]() ”Options” or In Tools>Options as shown in below image
”Options” or In Tools>Options as shown in below image

Under “System Options” select “File locations” and Browse through Show
folders and Select “Design Library” as shown in below image.

Click “Add” and a Windows Explorer Dialog Box opens.
Browse through the Windows Explorer and select the folder which contains the
required files. Click “OK”.

Click “OK” again if prompted Click “Yes”.

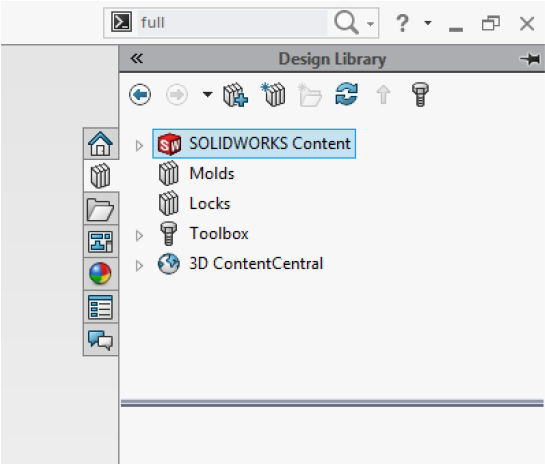
You can check in Design Library pane that the file location has been added.

Hence by using one of above methods the commonly used files are accessible
easily and the Design process can be made faster.


